We have been working on our little 1967 Santa Fe Cub just about every day since I last posted. There were a couple of days of rain that delayed progress and in one case even caused us do redo work ruined by the rain. The work during the last 10 days has been tedious. A lot of time has been spent discussing the best way things could be done. My dad has a lot of input, he has owned and repaired his RVs for some 35 years. Our goal is to have our trailer ready for a camping trip on the 16th of June.
We had started to reconstruct the front end of the trailer the last time I posted. We ended up taking the front end off the next day so that we could run the electrical and place the floor more easily.
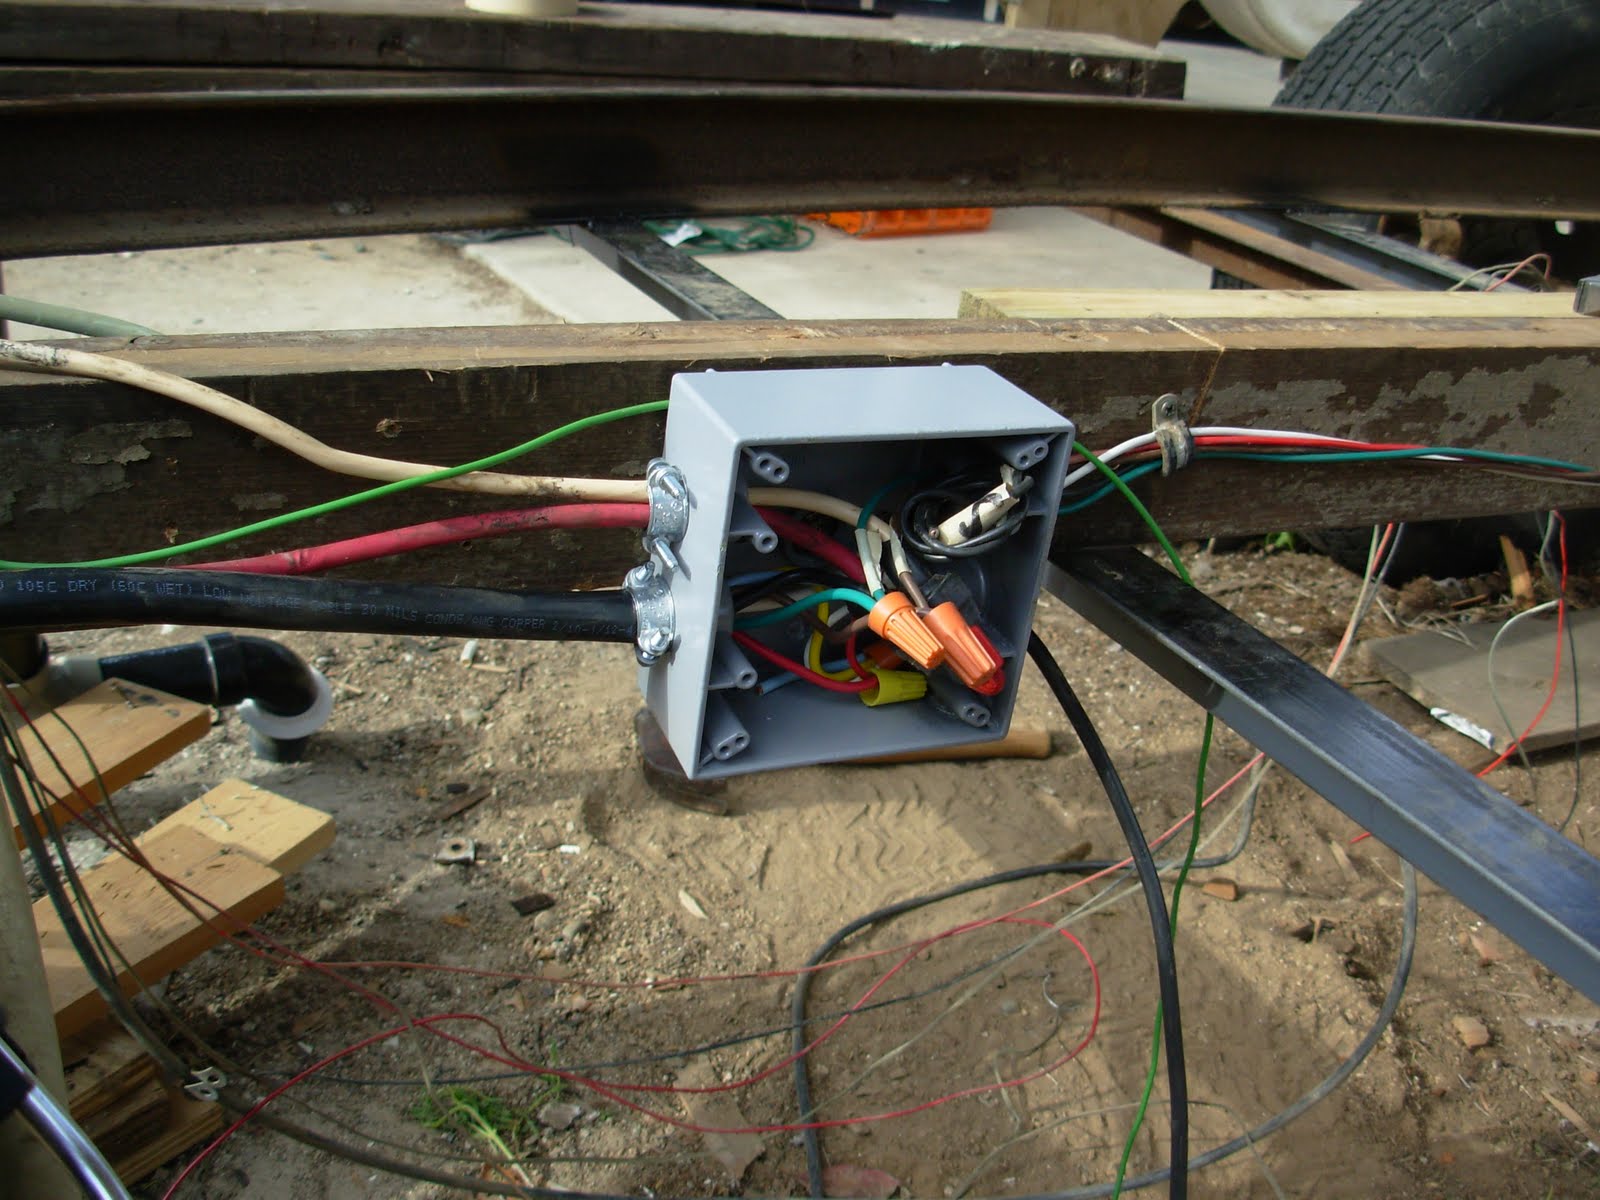
The wiring harness was originally a round 4 pin plug. We changed to a standard 7 pin plug. I purchased a new trailer side plug that was molded with 8 feet of wiring. My dad retrieved his electrical tool belt from the truck and got to work. I understand it now, but it sounded like a bowl of spaghetti when he was explaining it to me. Basically the wire from the plug goes to a junction box and every thing is connected in the box. We ran the wiring under the frame, instead of through the walls. Easier to get to if there is a problem. You will also notice 3 new pieces of lumber to support the floor.
We decided to use 5/8" exterior ply board of the floor. The cut out for the wheel well was lined with window flashing tape. The tape is gooey pitch on a foiled plastic liner. The normal RV putty was then sandwiched between the well and the floor. The well is attached from the bottom. I found enough Under Belly liner at
www.RVdoctorGeorge.com to take care of sealing her up good and tight. I am sparing nothing to ward off future damage from water and critters. We only breached the protective barrier in one spot to bring in the 12v power. On the side, RV Doctor George is located on El
Camino behind Pan Pacific. If you live in the area and need a used piece of anything RV, it can be found here. It is a fun place to wander around.
After the floor was laid we put the front end back on. The window still needs to be framed in and cut out of the hardboard. We used the white enameled sheets.
My dad wired up the 12 volt system and the 120v as well. I found a fuse board out of an old converter at the RV wrecking yard, so the 12v system will have up to 9 fuses available. The breaker box and fuse board is temporarily connected to the wall until we put the panelling up. A small amount of wiring will be contained in the ceiling and the the rest is all inside the cabinets. Easy access for changes and no chance of putting a staple through a wire in the wall.
You will want to click on these two pictures to get the larger versions. After a lot of discussion, my dad tapered a 2" piece of lumber down to 5/8" at each end, then attached it to the side of the existing rib. The ceiling is the same height inside,but gains a nice water shedding, taught shape on the out side. Every piece we put up made it better. Originally there were only 3 ribs going across and several "floating ribs that were just glued to the ceiling. We ended up with seven "engineered" ribs spanning the roof.
Turning the yard into a sandbox. Lou's sandblaster makes easy work of stripping the rust and gunk from the steps. The steps work smoothly now. A coat or Rustoleum and they will be good as new. I will strip down the tongue of the trailer with the sandblaster as well.
We wanted to insulate the travel trailer and thought that foam might be the easiest. I was a little worried that it would not form nicely in the curves, but it went in like a champion. Hopefully the foam will help protect us from extreme temps and give us a little quieter environment. It feels great to see some progress on the interior of the rig.
Until next time...